
Guided Installations: The Manifest Describes, the Install Follows
Claim a Selora Hub on site and Selora Connect turns the installation manifest into a live runbook. Devices are detected as they pair, scenes, automations, and dashboards are built for you, and Selora Assistant is beside you at every step.
Last week we introduced Installation Manifests : the plan for a customer’s home, built at a desk before anyone gets in the van. A plan is only half the job. The other half happens in the customer’s hallway, with a hub in one hand and a phone in the other.
Guided Installations are that other half. The manifest describes the home. The guided installation executes it.
It starts when you claim the hub
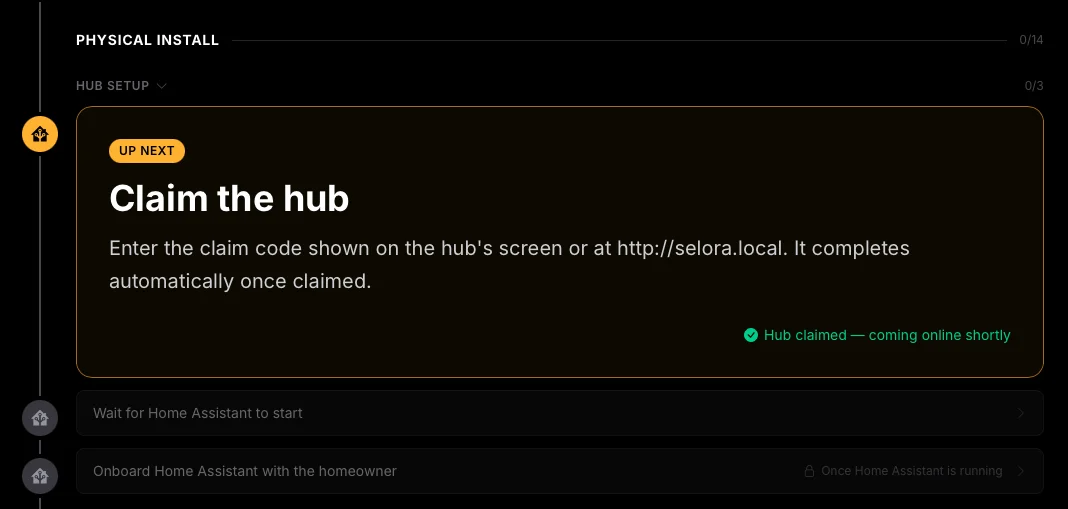
Claiming the Selora Hub is usually the first thing you do on site, so that is where the guided installation begins. When you claim a hub, Selora Connect asks whether it is for one of your projects. Pick the project, and you land straight in its installation console, with the manifest already turned into a runbook.
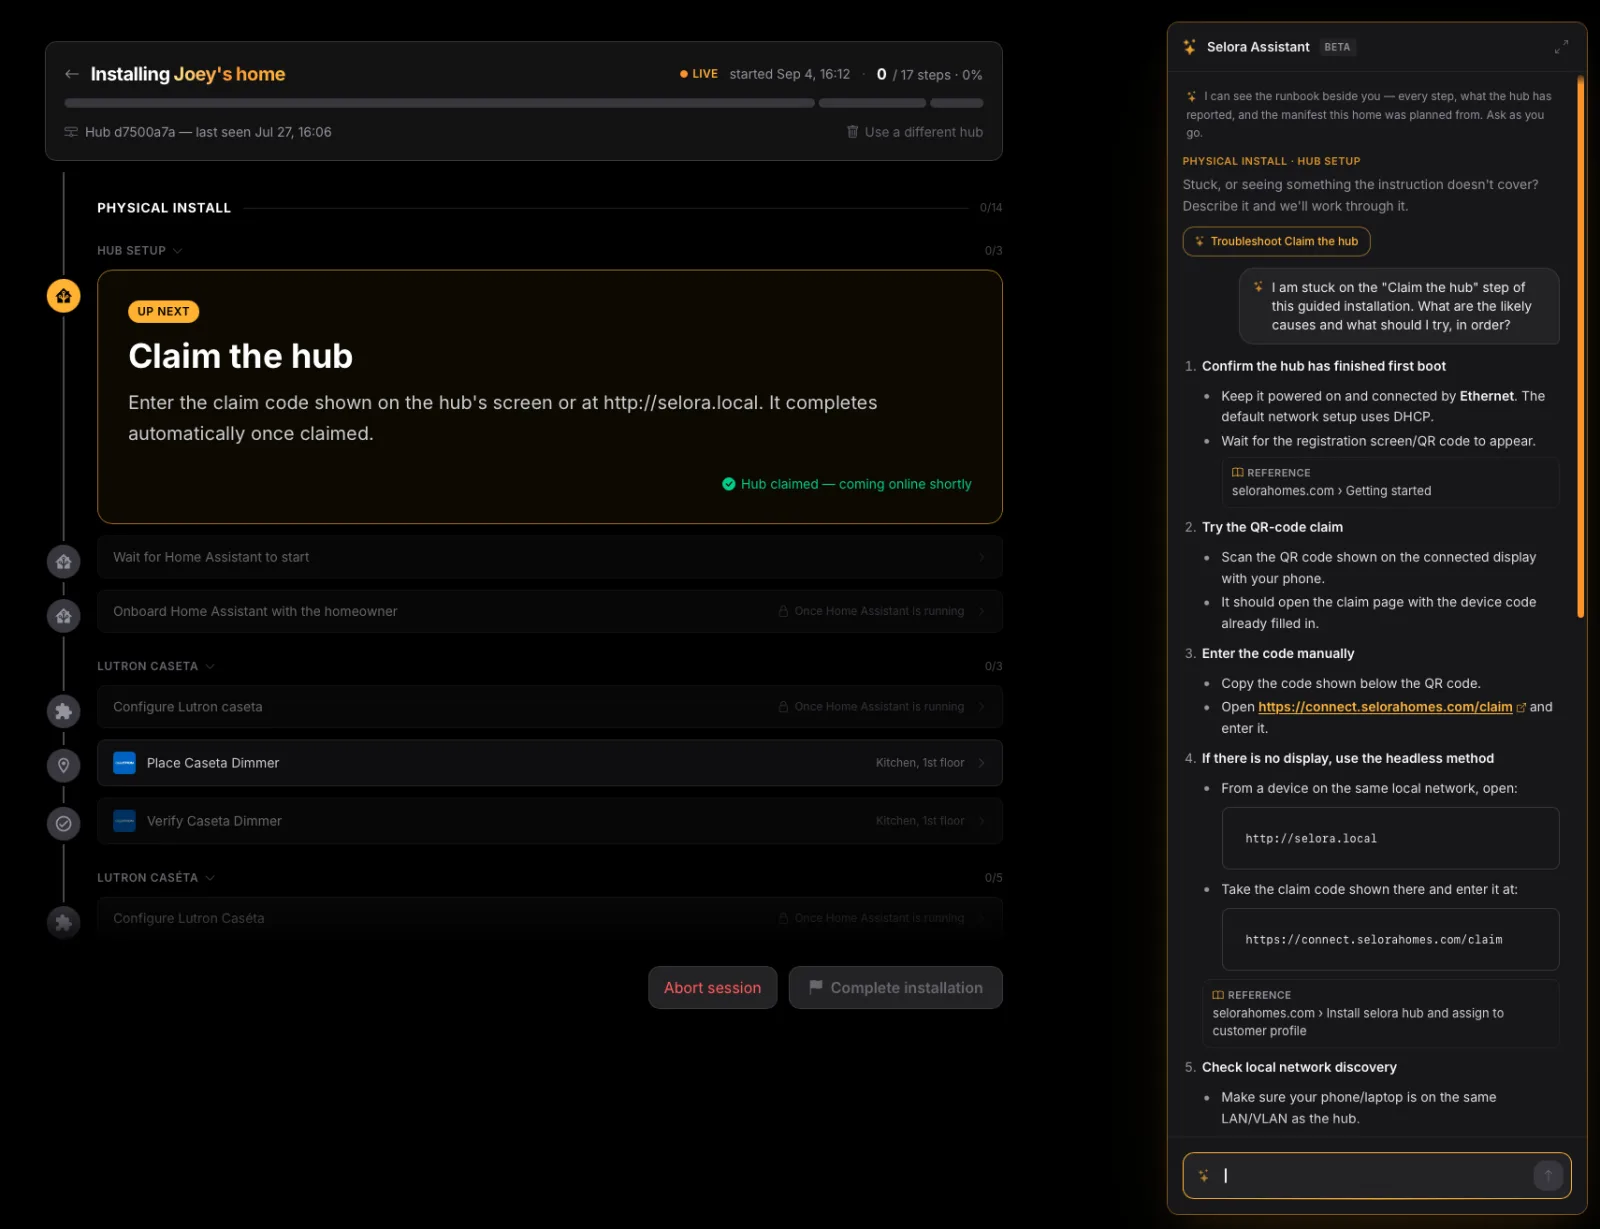
The runbook follows the order the work actually happens in, in three phases:
- Physical install: set up the hub, gather the passwords and accounts the integrations need, then install every device, area by area, grouped under the integration it belongs to.
- Programming: the scenes, automations, and dashboards planned in the manifest.
- Wrap-up: the walkthrough and handover with the homeowner.
One step is up next at any time, with its instruction and the room it belongs in. You never have to scan a list to work out what to do.
Home Assistant, from anywhere, for as long as you need it
Outside a guided installation, an installer who wants into a customer’s Home Assistant asks for access and waits for the homeowner to approve it. During the installation, that wait is gone. As soon as Home Assistant is running on the hub, Enable remote access appears at the top of the console. One click gives you your own temporary login to the home’s Home Assistant, from the phone in your pocket or the laptop in the van, without being on the customer’s network.
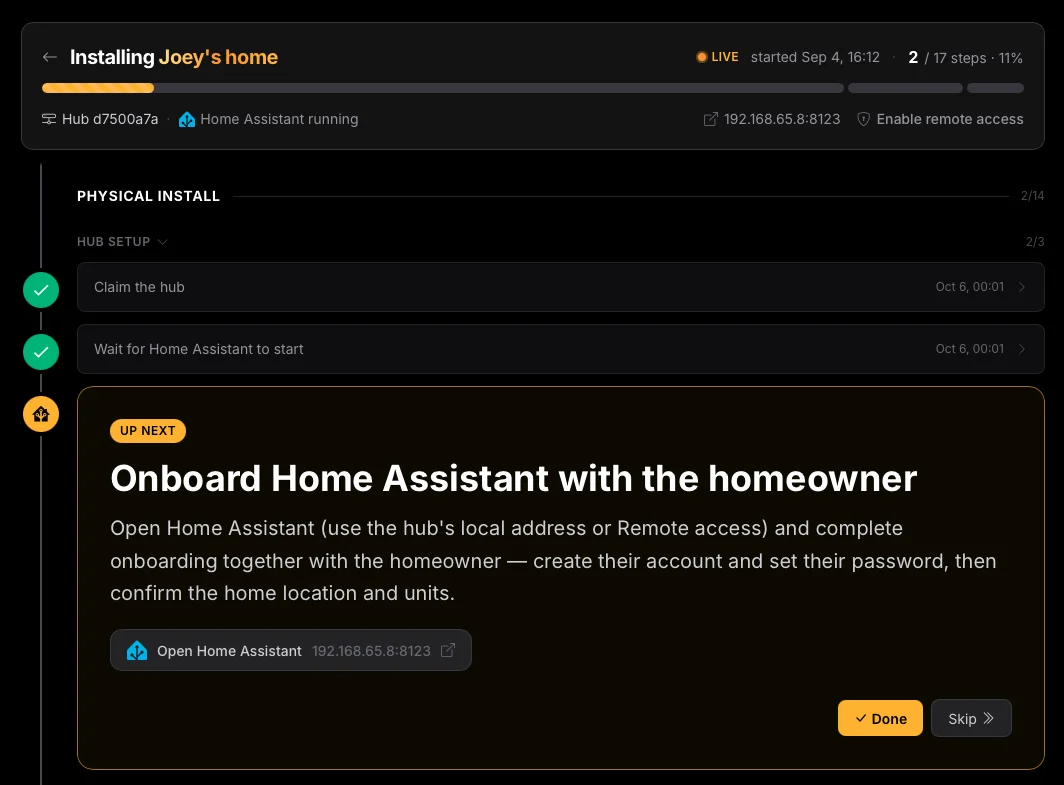
It lasts for the time of the installation and no longer. When you complete or abort the session, Selora closes the access for you. There is nothing to remember to revoke, and nothing left open behind you once you have handed over the keys.
Devices check themselves off
You do not tick a box to say a device is installed. While the session is live, the hub reports what Home Assistant sees, and Selora Connect matches each new device against the manifest: brand, model, protocol, and the area you are working in. When the Caséta dimmer planned for the kitchen pairs, its step completes by itself.
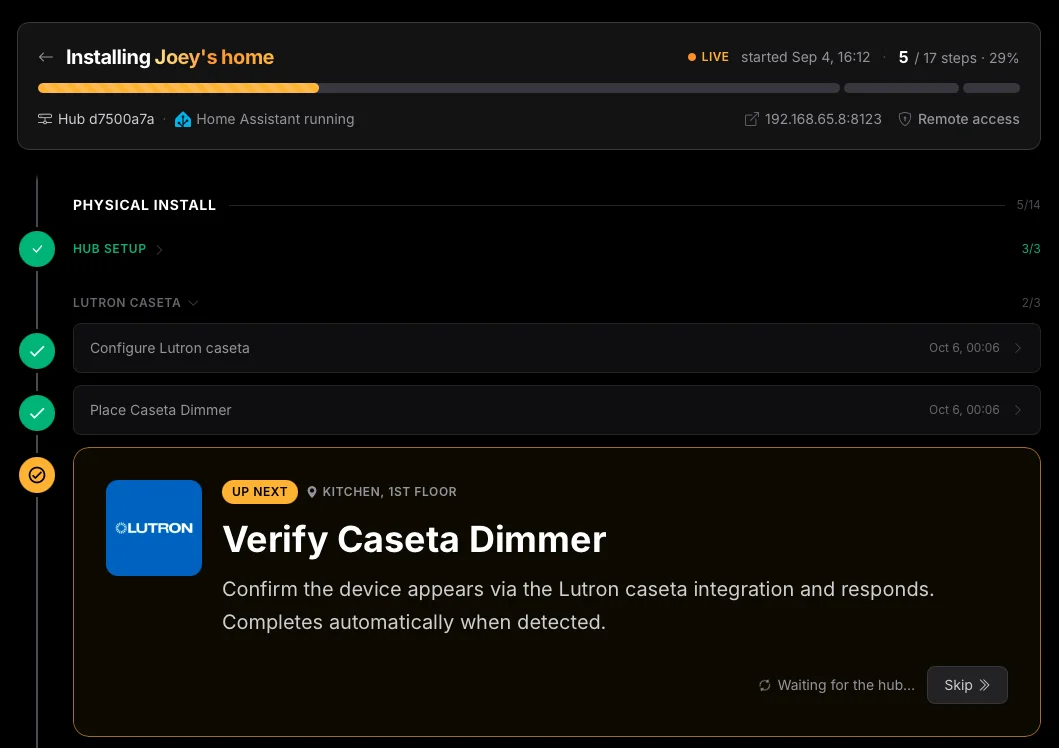
That is the difference between a checklist and a guided installation. The runbook is not what you say you did. It is what the house actually holds.
Programming, done before you get to it
Everything in the manifest’s Programming phase was described weeks ago: “evening scene in the living room”, “turn the porch light on at sunset”, “a tablet dashboard for the kitchen”. Once the devices are in, Selora builds those in Home Assistant for you, using the devices that actually paired:
- Floors and areas are created as planned, and each device is moved into the room the manifest put it in.
- Scenes and automations are written by Selora AI on the hub, against the home’s real entities.
- Dashboards are laid out from your description, as new dashboards of their own. The homeowner’s existing dashboards are left alone.
Each card reports what was built, with a link straight into Home Assistant. New automations arrive switched off, so nothing starts running while you are still testing the lights. If something cannot be built, the step stays open with instructions to finish it by hand.
The goal is simple: anticipate everything that can be anticipated, so the time you spend at the customer’s home goes to the work only a person on site can do.
Never alone on site
Selora Assistant sits next to the runbook for the whole installation. It knows the Selora device catalog , our public documentation , and the current state of the install: every step, what the hub has reported, and the manifest the home was planned from.
Stuck on a step? The assistant offers to troubleshoot the one you are on, and walks through the likely causes in order, with links to the relevant guide. Or just ask: which bridge does this lock need, why has this sensor not shown up yet, what does the homeowner need to have ready for this integration. Selora AI usage during a guided installation is not counted against the homeowner’s allowance.
What’s next
Today, Selora detects devices and builds the programming. Next on the list is the most delicate part of any install: the homeowner’s accounts and passwords. With Secure Credential Management , they never pass through your hands.
Credentials, requested ahead of time. Cloud accounts and other service logins are awkward to collect on site. You will request them from the project in advance, and the homeowner will enter them securely in Selora Connect, encrypted with a key of their own. On installation day, Connect provisions Home Assistant with them directly, without sharing them with anyone, you and your technicians included. Once the installation is approved, they are deleted.
Accounts, created for the homeowner. When a device needs an account of its own, like a camera service, Selora will create it on the homeowner’s behalf and deliver the credentials straight to them in Selora Connect.
Every step we automate is time back for you and the homeowner.
Try it on your next install
Plan the home in the installation manifest , then claim the hub on site and pick the project. The guided installation guide walks through the console step by step.
Tell us where it slows you down. Your partner contact at Selora will get your feedback to the team, or write to support@selorahomes.com .