Install SeloraBox and Assign to Customer Profile
Place the pre-installed SeloraBox on-site, claim it to the customer, and get Home Assistant ready for the support call.
Search results
Before you start
Before beginning these steps, make sure the customer is present with their computer and smartphone, since customer account access is needed during setup. The SeloraBox comes pre-installed with the correct operating software, and any required dongles must be available on-site.
Install the SeloraBox
- Place the pre-installed SeloraBox at the location that matches the installation plan.
- Connect the device to the customer’s network using Ethernet.
- Connect any required communication protocol dongles called for in the installation plan.
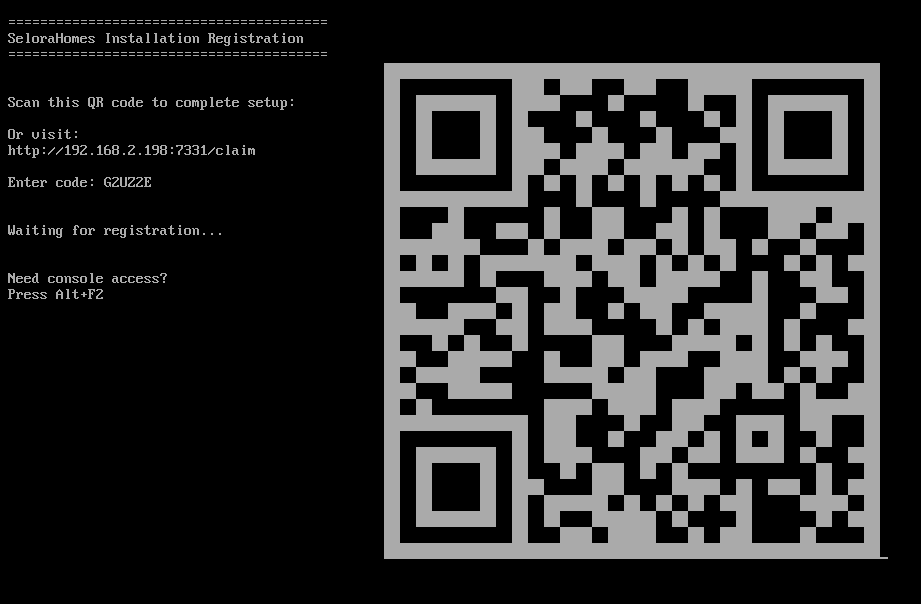
- Power on the device and wait for the registration screen.
Claim the SeloraBox
After the first boot completes, the SeloraBox enters registration mode and displays a QR code on the screen. If no screen is connected, see Option 3 below for a headless alternative.
You have three options to claim your device:
Option 1: Scan the QR Code
- Use your mobile device to scan the QR code displayed on screen
- This will automatically open the claim page with your device code
Option 2: Manual Entry
- Note the code displayed below the QR code on screen
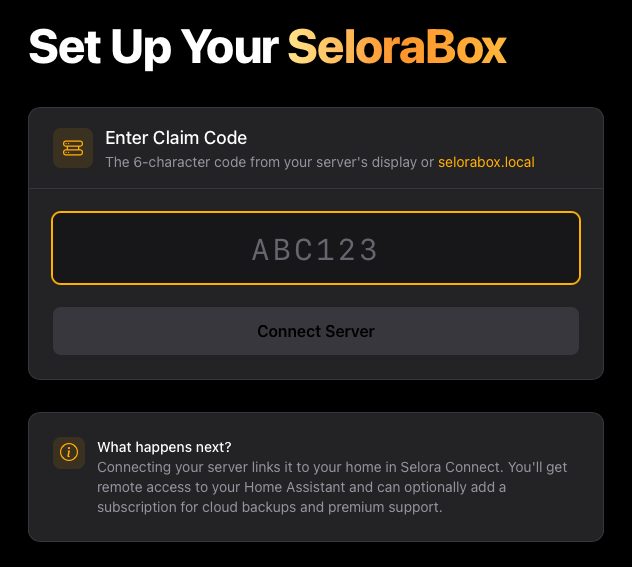
- Navigate to https://connect.selorahomes.com/claim
- Enter the code manually
Option 3: No Screen Connected
If you cannot connect a screen to the smart hub, you can retrieve the claim code from a browser:
- From a device on the same network, navigate to http://selorabox.local
- The claim code will be displayed on the page
- Navigate to https://connect.selorahomes.com/claim and enter the code
Customer Assignment
The Selora Connect portal will prompt you to assign the device to a customer:
- Create a new customer: Set up a new customer profile for this installation
- Connect to existing customer: Link this device to an existing customer by providing their email address
Confirm the claim links the SeloraBox to the correct customer profile and the installation appears in the customer’s Selora Homes dashboard .
Complete the Setup
- On the customer’s computer, confirm Home Assistant is accessible at homeassistant.local:8123 .
- Follow the Home Assistant onboarding flow shown in the interface to complete the initial setup.
- Call a Selora Homes Customer Support Engineer using the phone number in the installation plan to continue setup and integration support.
Completion Check
Before moving on, confirm:
- The SeloraBox has been claimed to the correct customer.
- The installation is visible in the Selora Homes Dashboard.
- Home Assistant opens locally.
- The customer is ready for the support call.
Last modified April 2, 2026: Add Installer Field Support Guide (c5d759b)