
Remote Access
Enable Selora Homes remote access, choose a protection mode, use it in a browser, and configure the same remote access URL in the Home Assistant Companion App.
Use this draft comparison guide to turn on Selora Homes remote access, use your remote URL in a browser, and then set up the same remote URL in the Home Assistant Companion App.
Prerequisites
Before enabling remote access, ensure:
- Your Selora Hub installation is complete.
- Your installation is registered in Selora Connect.
- You have an active Selora Homes subscription .
Turn On Remote Access in Selora Homes
Once your installation is complete and your subscription is active:
- Log in to your Selora Homes Dashboard at connect.selorahomes.com .
- Open your installation.
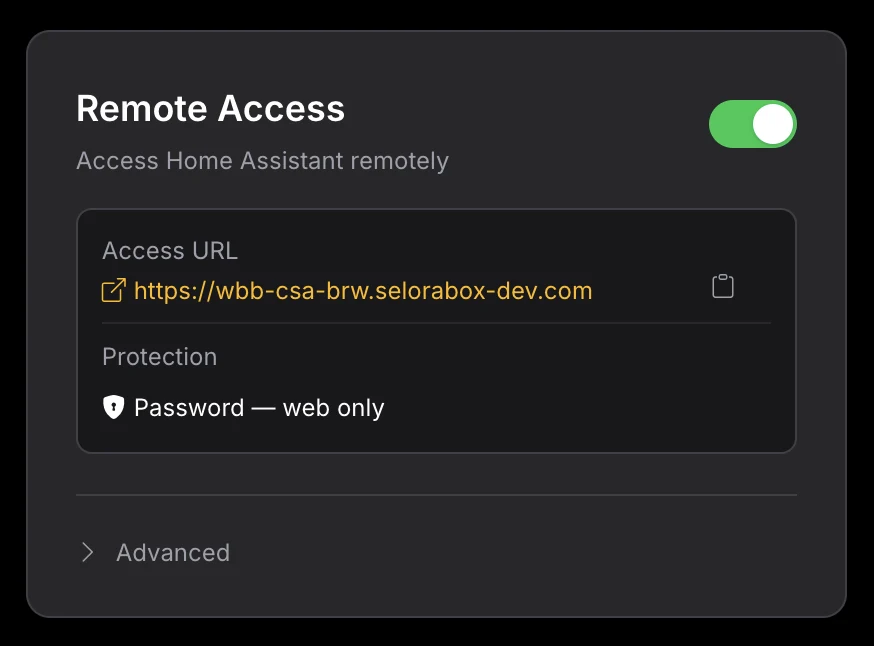
- Find the Remote Access section on the installation page.
- Turn on Remote Access.
- Confirm you now see your personal remote access URL and password.
- Save both in a secure location, such as a password manager.
- Check the Protection mode shown on the card and change it if it does not match what you need. See Choose Your Protection Mode .
Use Your Remote Access URL in a Browser
After Remote Access has been turned on:
- Open your personal remote access URL in a browser.
- Enter the remote access password when prompted. Either password mode prompts here; Public does not.
- Sign in to Home Assistant with your Home Assistant username and password.
- Confirm that your Home Assistant dashboard loads correctly.
Use the Same Remote Access URL in the Companion App
The Home Assistant Companion App has its own settings for remote access.
- Make sure the app is already installed and signed in.
- Follow Home Assistant Companion App Remote Access .
- Confirm the app can load your Home Assistant dashboard after the remote URL has been added.
Password Protection
By default, remote access generates a password to protect access to your Home Assistant instance. Save this password in a secure location, such as a password manager.
When connecting to the remote URL from a browser, you will be prompted to enter this password before reaching the Home Assistant login page.
If you lose the password, select Regenerate password in the Remote Access section of your installation page. The old password is revoked instantly and can no longer be used.
Choose Your Protection Mode
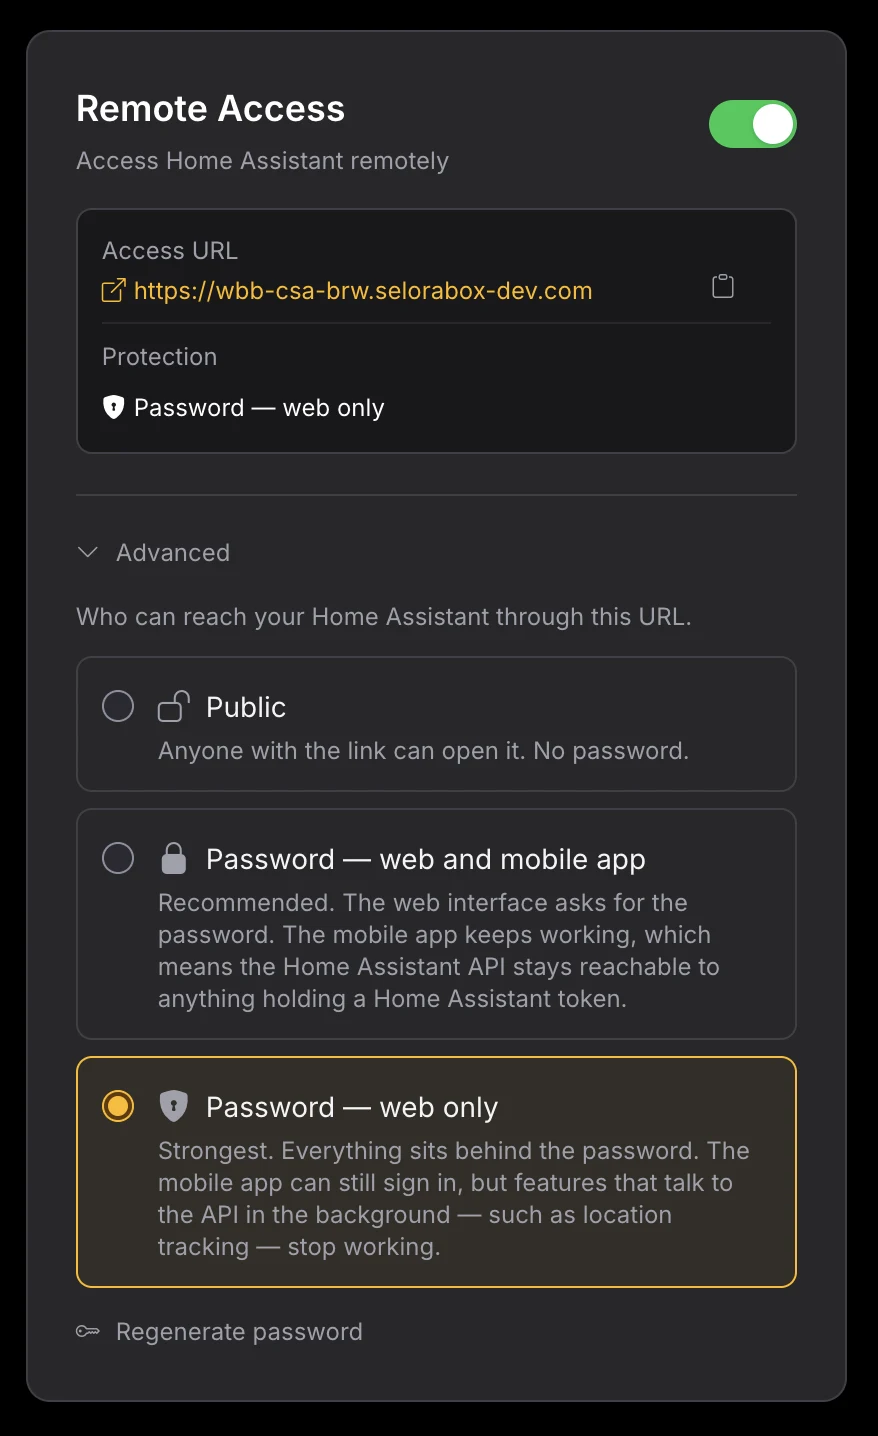
Expand Advanced on the Remote Access card to choose who can reach your Home Assistant through the remote URL. There are three modes, trading flexibility against security.
Public
No password. Anyone with the link can open your Home Assistant login page.
Your Home Assistant username and password are still the last line of defence, and every Companion App feature works. But your installation is directly exposed to the internet, including to automated scanners that find hostnames within hours. Use this only for a short, deliberate reason, and switch back afterwards.
Password, web and mobile app
Recommended, and the best balance for most homeowners. The web interface asks for the remote access password. The Companion App keeps working in full, including location tracking, device sensors, live entity states, Assist, and Watch or CarPlay.
This works because the paths the app’s native sessions depend on bypass the password layer. Those sessions are not browser sessions, so a password prompt in front of them does not fail gracefully, it breaks the feature outright.
| Path | Primary role |
|---|---|
/api/webhook/* | Location tracking and device sensor updates |
/api/websocket | Live entity states, Watch and CarPlay, Assist |
/auth/token | Token refresh, which otherwise forces a later re-login |
/api/* | Shortcuts, complications, widgets, camera attachments |
Read the last rule carefully. /api/* covers the first two rows and every other route under /api/, so in this mode
the whole Home Assistant API is reachable at your remote access URL without the remote access password. The web UI,
the Home Assistant login page, and everything outside those paths stay behind it.
What guards the bypassed paths is Home Assistant’s own authentication:
/api/*,/api/websocket, and/auth/tokenrequire a valid Home Assistant access or refresh token. The Companion App was issued one when it was paired with your installation, and requests arriving without one are rejected./api/webhook/*works differently. Home Assistant does not require a login on webhook requests: the webhook URL itself is the secret, a high-entropy random ID issued per device, and the Companion App encrypts the payloads it sends. Treat the app’s pairing as a credential, and delete a device from Home Assistant when you stop using it so its webhook ID stops working.
Password, web only
Strongest. Everything sits behind the remote access password, with no exclusions. Nothing reaches Home Assistant until the password has been entered.
The trade-off is real: the Companion App can still sign in, because you can enter the password in the app, but any feature that talks to the API in the background stops working. In practice that means location tracking and presence-based automations, device sensor updates, live entity state streaming, and Watch or CarPlay integrations. Push notifications you receive still work, since those arrive through Apple or Google rather than your remote URL.
Choose this mode if you use remote access from a browser and do not rely on the app’s background features, or if your threat model requires that nothing at all is reachable without the password.
Which Mode Should You Pick
| Mode | Web password | Companion App | Use when |
|---|---|---|---|
| Public | No | Fully working | Short, deliberate exceptions only |
| Password, web and mobile app | Yes | Fully working | Default choice for most homeowners |
| Password, web only | Yes | Sign-in only | Browser-only use, or a strict threat model |
Further Reading
Last modified October 15, 2026: Refresh installer directory (b212166)